1. Section Off
 Section
off hair from the front of your head, towards the back of the top of
your head. Put the remaining hair below that into a ponytail. If you
have trouble doing this try clipping the top section of the hair so you
have hands to tie the bottom half into a ponytail.
Section
off hair from the front of your head, towards the back of the top of
your head. Put the remaining hair below that into a ponytail. If you
have trouble doing this try clipping the top section of the hair so you
have hands to tie the bottom half into a ponytail.(The hair in the ponytail won't be used for the rest of the braiding process).
2. Braid
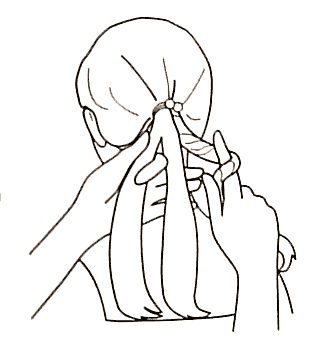
 Brush
your hair over to one side (the side towards you), exposing your ear.
Starting behind the ear take three pieces of hair and braid once.
Brush
your hair over to one side (the side towards you), exposing your ear.
Starting behind the ear take three pieces of hair and braid once. 3. Add
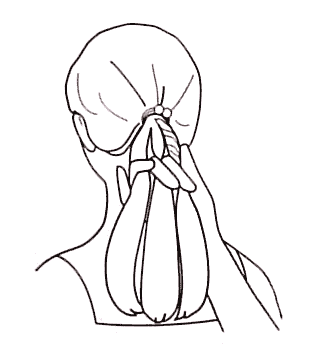
 Now
add hair to the side closest to you forehead (almost as you would in a
dutch/french braid, but you're only adding from the one side).
Now
add hair to the side closest to you forehead (almost as you would in a
dutch/french braid, but you're only adding from the one side). 4. Follow Through
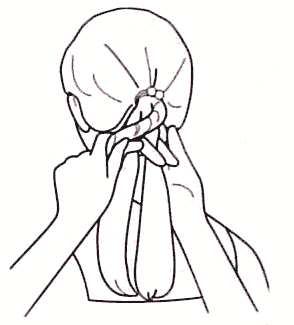
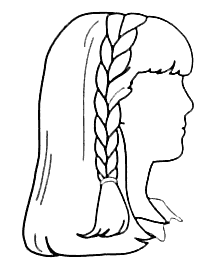
 Continue
braiding--either in a french or dutch braid pattern, the choice is up
to you--across the top of your head (not right up on your hairline, this
isn't a headband braid).
Continue
braiding--either in a french or dutch braid pattern, the choice is up
to you--across the top of your head (not right up on your hairline, this
isn't a headband braid).(The photo shows the braid starting at the top of the head, it is a different variation of the braid and is not the one being shown in this tutorial)
5. Braid Off
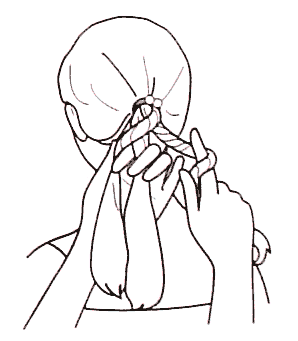
 Once
you reach the other side of your head braid off the remaining hair and
tie with a hair tie. You can now take the bottom hair you tied back at
the beginning out of it's ponytail.
Once
you reach the other side of your head braid off the remaining hair and
tie with a hair tie. You can now take the bottom hair you tied back at
the beginning out of it's ponytail.